Craftsman CR-KYPD Manuel du propriétaire
Naviguer en ligne ou télécharger Manuel du propriétaire pour Ouvreur de porte de garage Craftsman CR-KYPD. Craftsman CR3-BM Owner's manual Manuel d'utilisatio
- Page / 56
- Table des matières
- DEPANNAGE
- MARQUE LIVRES
- Write down the Craftsman 1
- Symbols and Icons 2
- Inventory 3
- Tools Required 4
- Rail and Trolley Assembly 5
- Installing Cable and Chain 6
- Mounting Header Bracket 8
- CAUTION 9
- Mounting Opener to Ceiling 10
- Attaching Door Arms 11
- WARNING 12
- Wiring Instructions 13
- Connecting Power 16
- Travel Limit Adjustment 17
- Force Adjustment 18
- Programming 1– Button Remote 20
- SAVE THESE INSTRUCTIONS 22
- Operating the Opener 23
- Door Status vs. Activation 24
- Troubleshooting 25
- Repair Parts 26
- Opener Assembly Parts 27
- CRAFTSMAN WARRANTY 28
- Símbolos e iconos 29
- Tabla de Contenidos 29
- Inventario 30
- Herramientas requeridas 31
- Montaje del Reil y Carro 32
- ADVERTENCIA 34
- Línea central vertical de la 36
- Tirafondo 5/16” x 1-1/2’’ 37
- ADVERTENCIA 39
- Instrucciones de Cableado 40
- Desde uno de los 41
- Desde el 41
- Desde el botón de oprimir 42
- BOTÓN DE OPRIMIR 42
- Mín. 5 pies (1,5 m.) 42
- ADVERTENCIA 44
- Ajuste de Fuerza 45
- Ajuste Final y Prueba 46
- Operación del Abridor 50
- CONECTAR 51
- Halar para desconectar 51
- Mantenimiento 52
- Piezas de Recambio 53
- GARANTÍA CRAFTSMAN 55
Résumé du contenu
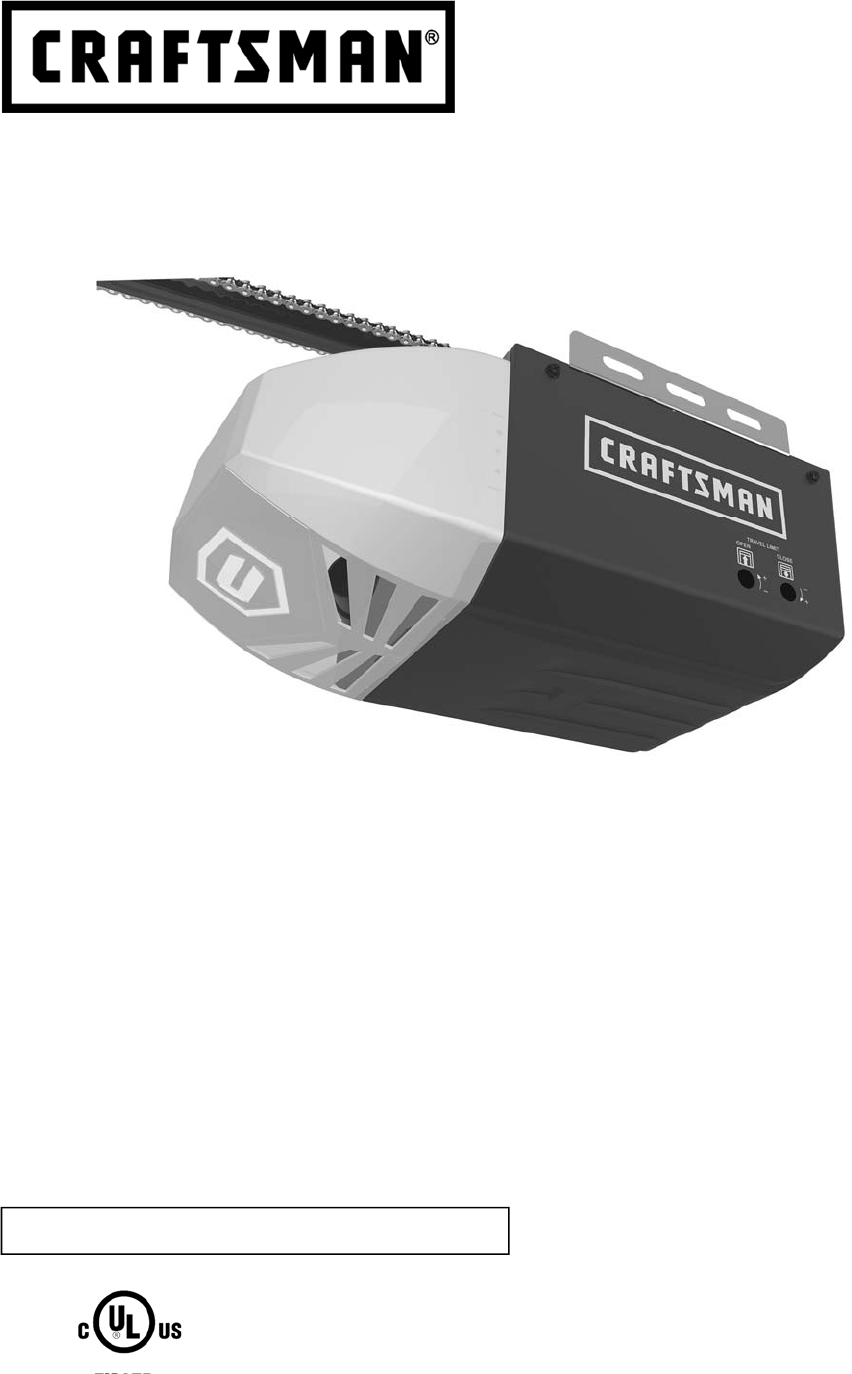
Owner’s Manual/Manual Del Propietario Read and follow all safety rules and operating instructions before first use of this product. Fasten the manu
10 To Mount the Opener to Ceiling The three most common installation options are shown in Fig.1-3. Fig.1 shows mounting the opener directly to s
11 Attaching Door Arms ! WARNING To prevent SERIOUS INJURY: - DO NOT connect power until instructed. - Keep hands and fingers away from the sprocket
12 Installing Light and Emergency Release Handle To install the light: 1. Insert screw driver between lens and the cover at the detents, pry a
13 Wiring Instructions Photo Eye Safety System Wires to the terminals on the opener Terminals In the following section, the photo eye safety system
14 Connecting Photo Eye Safety System About the Photo Eye Safety System The photo eye safety system provides protection against entrapment w
15 To Connect the Push Button to the Opener Connect the pair of wires from the push button to the pair of “PUSH BUTTON” terminals on the rear of the
16 Connecting Power Aligning the Photo Eye Safety System: 1. When power is supplied, the green photo eye (Emitter) will flash until it is aligned
17 About Travel Limits Limit adjustments regulate the position at which the door will stop when opening and closing. BEFORE making any adjustments,
18 Adjusting Force 1. Force adjustment controls are located on the rear panel of the opener. The force adjustments regulate the amount of force r
19 Testing the Safety Reverse System The Safety Reverse System prevents the door from closing when an obstruction is present. 1. Open the door by u
2 Table of Contents Courtesy light turns on/flashes with audible ‘click’. (If light bulb is not installed, ‘click’ represents the light) DO NOT con
20 Programming 1– Button Remote ! WARNING To prevent SERIOUS INJURY or DEATH: - Keep remote and battery out of reach of children. - NEVER permit ch
21 To purchase a wireless keyless entry keypad, visit a Craftsman outlet, call 1-888-331-4569, or go online to www.craftsman. com ! WARNING To preve
22 To reduce the risk of severe injury or death: 1. READ AND FOLLOW ALL INSTRUCTIONS. 2. Never let children operate or play with door controls
23 Operating the Opener ! WARNING To prevent SERIOUS INJURY or DEATH: - READ AND FOLLOW ALL INSTRUCTIONS AND WARNINGS IN THE OWNER’S MANUAL AND LABE
24 ! WARNING To prevent SERIOUS INJURY or DEATH: - Use emergency release to disconnect trolley ONLY when the door is CLOSED to prevent unexpected r
25 Troubleshooting Problem Possible Cause / Solution Opener does not close and light flashes The photo eye safety system is misaligned or obstructe
26 Repair Parts Installation Parts Rail Assembly Parts Accessories Part No. Name / Description RP-001 Rail—Header Segment RP-002 Rail—Middle Se
Part No. Name / Description GUAT-327 Sprocket Cover GUAT-323 Sprocket and Gear Assembly GUAT-341 Chassis GUAT-303 Light Plate CR-003 Light Lens
CRAFTSMAN WARRANTY 90-DAY IN-HOME LIMITED WARRANTY FOR 90 DAYS from the date of sale this product is warranted against defects in material or
29 Introducción Símbolos e Íconos 29 Inventorio 30 Preparación / Prueba de Balance de la Puerta
3 — Door arms / Mounting Opener Inventory x 2 Clevis Pin — Pulley 3/8” x 1-3/4” Hitch Pin — Locking Clevis Pins x 4 Lag Screw #12 x 1”— Photo Eye Sy
30 — Brazos Puerta / Montaje Abre-puertas Inventario x 2 Pasador horquilla — Polea 3/8” x 1-3/4 Pasador — Pasadores de Cierre x 4 Tornillo Tirafon
31 Preparación Puerta de Garaje Seccional ANTES de Comenzar la Instalación: 1. Desactive las cerraduras y quite todas las cuerdas Conec
32 PRECAUCIÓN Montaje del Reil y Carro Cuando conecte los rieles, asegúrese de que queden conectados de forma segura, como se muestra arriba. Par
33 Para instalar la cadena 1. Tire el resto de la cadena a lo largo del riel hacia el abre-puerta. 2. Se observará un segmento de la cadena marc
34 Para reducir el riesgo de lesiones graves o la muerte: 1. LEA Y RESPETE TODAS LAS ADVERTENCIAS Y LAS INSTRUCCIONES DE INSTALACIÓN. 2. In
35 Para Instalar el Soporte Cabecero Nota: Los procedimientos de instalación pueden variar de acuerdo al tipo de puerta. 1. Mientras esté dentro d
36 Colocación del Riel en el Soporte Cabecero y Montaje del Soporte de la Puerta Fig.1 Fig.2 Fig.3 Caja de cartón Pasador de enganche UP Línea ce
37 Para Montar el Abre-puerta al Techo Las tres opciones de instalación más comunes están mostradas en las Figuras 1-3. Figura 1 muestra el montaj
38 Fijación de los Brazos de la Puerta NOTA: El brazo recto de la puerta debe ser instalado verticalmente a la puerta cuando la puerta está en la
39 Instalación de la Luz y la Manija de Desconexión de Emergencia !
4 Preparation Level Tape Measure Hack Saw Pencil Drill, 3/16” and 5/16” Drill Bits Tools Required Step Ladder Screwdriver Hammer Sectional Garage D
40 Instrucciones de Cableado ! ADVERTENCIA Para prevenir LESIONES GRAVES o MUERTE por electrocución: - La energía NO DEBE conectarse ha
41 Conexión del Sistema de Seguridad de Sensor Óptico AVISO: La abre-puerta no se cerrará hasta que se instalen el sistema de seguridad de sensor ó
42 Sujefadores para muro falso Tornillo #6 x1 Desde el botón de oprimir BOTÓN DE OPRIMIR Conexión del Botón de Control !
43 Para Alinear el Sistema de Seguridad de Sensor Óptico: 1. Cuando el Sistema de Sensor Óptico está conectado adecuadamente, el botón del sensor
44 Ajuste del Límite de Recorrido ! ADVERTENCIA - Para prevenir LESIONES GRAVES o MUERTE debido a un ajuste de fuerza inadecuado: - Un
45 FUERZA DE FUERZA APERTURA DE CIERRE Ajuste de Fuerza 1. Los controles del Ajuste de Fuerza están ubicados en el panel trasero del
46 Prueba del Sistema de Seguridad de Marcha Atrás El sistema de Seguridad de Marcha Atrás previene que la puerta se cierre cuando hay una obstrucc
47 Programación del Control Remoto 30 segundos ! ADVERTENCIA Para evitar LESIONES GRAVES o la MUERTE: - Mantenga el control remoto y la pil
48 Para comprar un teclado sin llave, visite una tienda de Craftsman, llame al 1-888-331-4569, o visite www.craftsman.com Fig.2 Fig.1 Programación
49 Para reducir el riesgo de lesiones graves o lamuerte: 1. LEA Y RESPETE TODAS LAS ADVERTENCIAS Y LAS INSTRUCCIONES DE INSTALACIÓN. 2. Siempre g
5 Rail and Trolley Assembly Opener Trolley direction (Top View) Clevis Pin Pulley Hitch Pin Clevis Pin — 3/8” x 1-3/4” Hitch Pin Connect shaft to Tr
50 Operación del Abridor Controles Operación Botón de Control Mantenga presionado el B
51 Estado de la Puerta vs. Activación Activación mediante botón de control/romoto En caso de un fallo de alimentación o la puerta obstrucción, tire
52 Solución de Problemas Problema Possible Cause / Solution El abre-puerta no cierra y la luz destella El Sensor Óptico puede estar obstruído, p
53 Para comprar piezas de recambio, llame al 1-888-331-4569 Piezas del Montaje del Riel Accesorios 1 2 3 4 5 6 7 8 1 2 3 4 5 6 7 1 2 5 3 4* 6
54 Pieza No. Nombre / Descripción GUAT-327 Cubierta de portacadena GUAT-323 Conjunto de engranaje y porta cadena GUAT-341 Chasis GUAT-303 Pane
55 GARANTÍA LIMITADA DE 90 DÍAS EN EL HOGAR POR 90 DÍAS a partir de la fecha de venta este producto está garantizado contra defectos de materi
6 To Install Chain 1. Pull the remaining chain along the rail toward the opener. 2. A segment of chain marked in RED will be seen. Place this seg
7 To reduce the risk of severe injury or death: 1. READ AND FOLLOW ALL INSTALLATION INSTRUCTIONS. 2. Install only on a properly balanced garage
8 To Install Header Bracket Note: Installation procedures may vary according to door type. 1. While inside your garage, close the door and mark th
9 Attaching Rail to Header Bracket and Mounting Door Bracket ! CAUTION To prevent SERIOUS INJURY: - DO NOT connect power until instructed. - REINFOR
Produits connexes et manuels pour Ouvreur de porte de garage Craftsman CR-KYPD

 (96 pages)
© 2020, manymanuals.fr. Tous droits réservés | 1.628 s |
 Manymanuals.com
 Manymanuals.de
 Manymanuals.fr
 Manymanuals.it
 Manymanuals.pl
 Manymanuals.cz
 Manymanuals.es
 Manymanuals-pt.com
Commentaires sur ces manuels